

Find your way around the editor
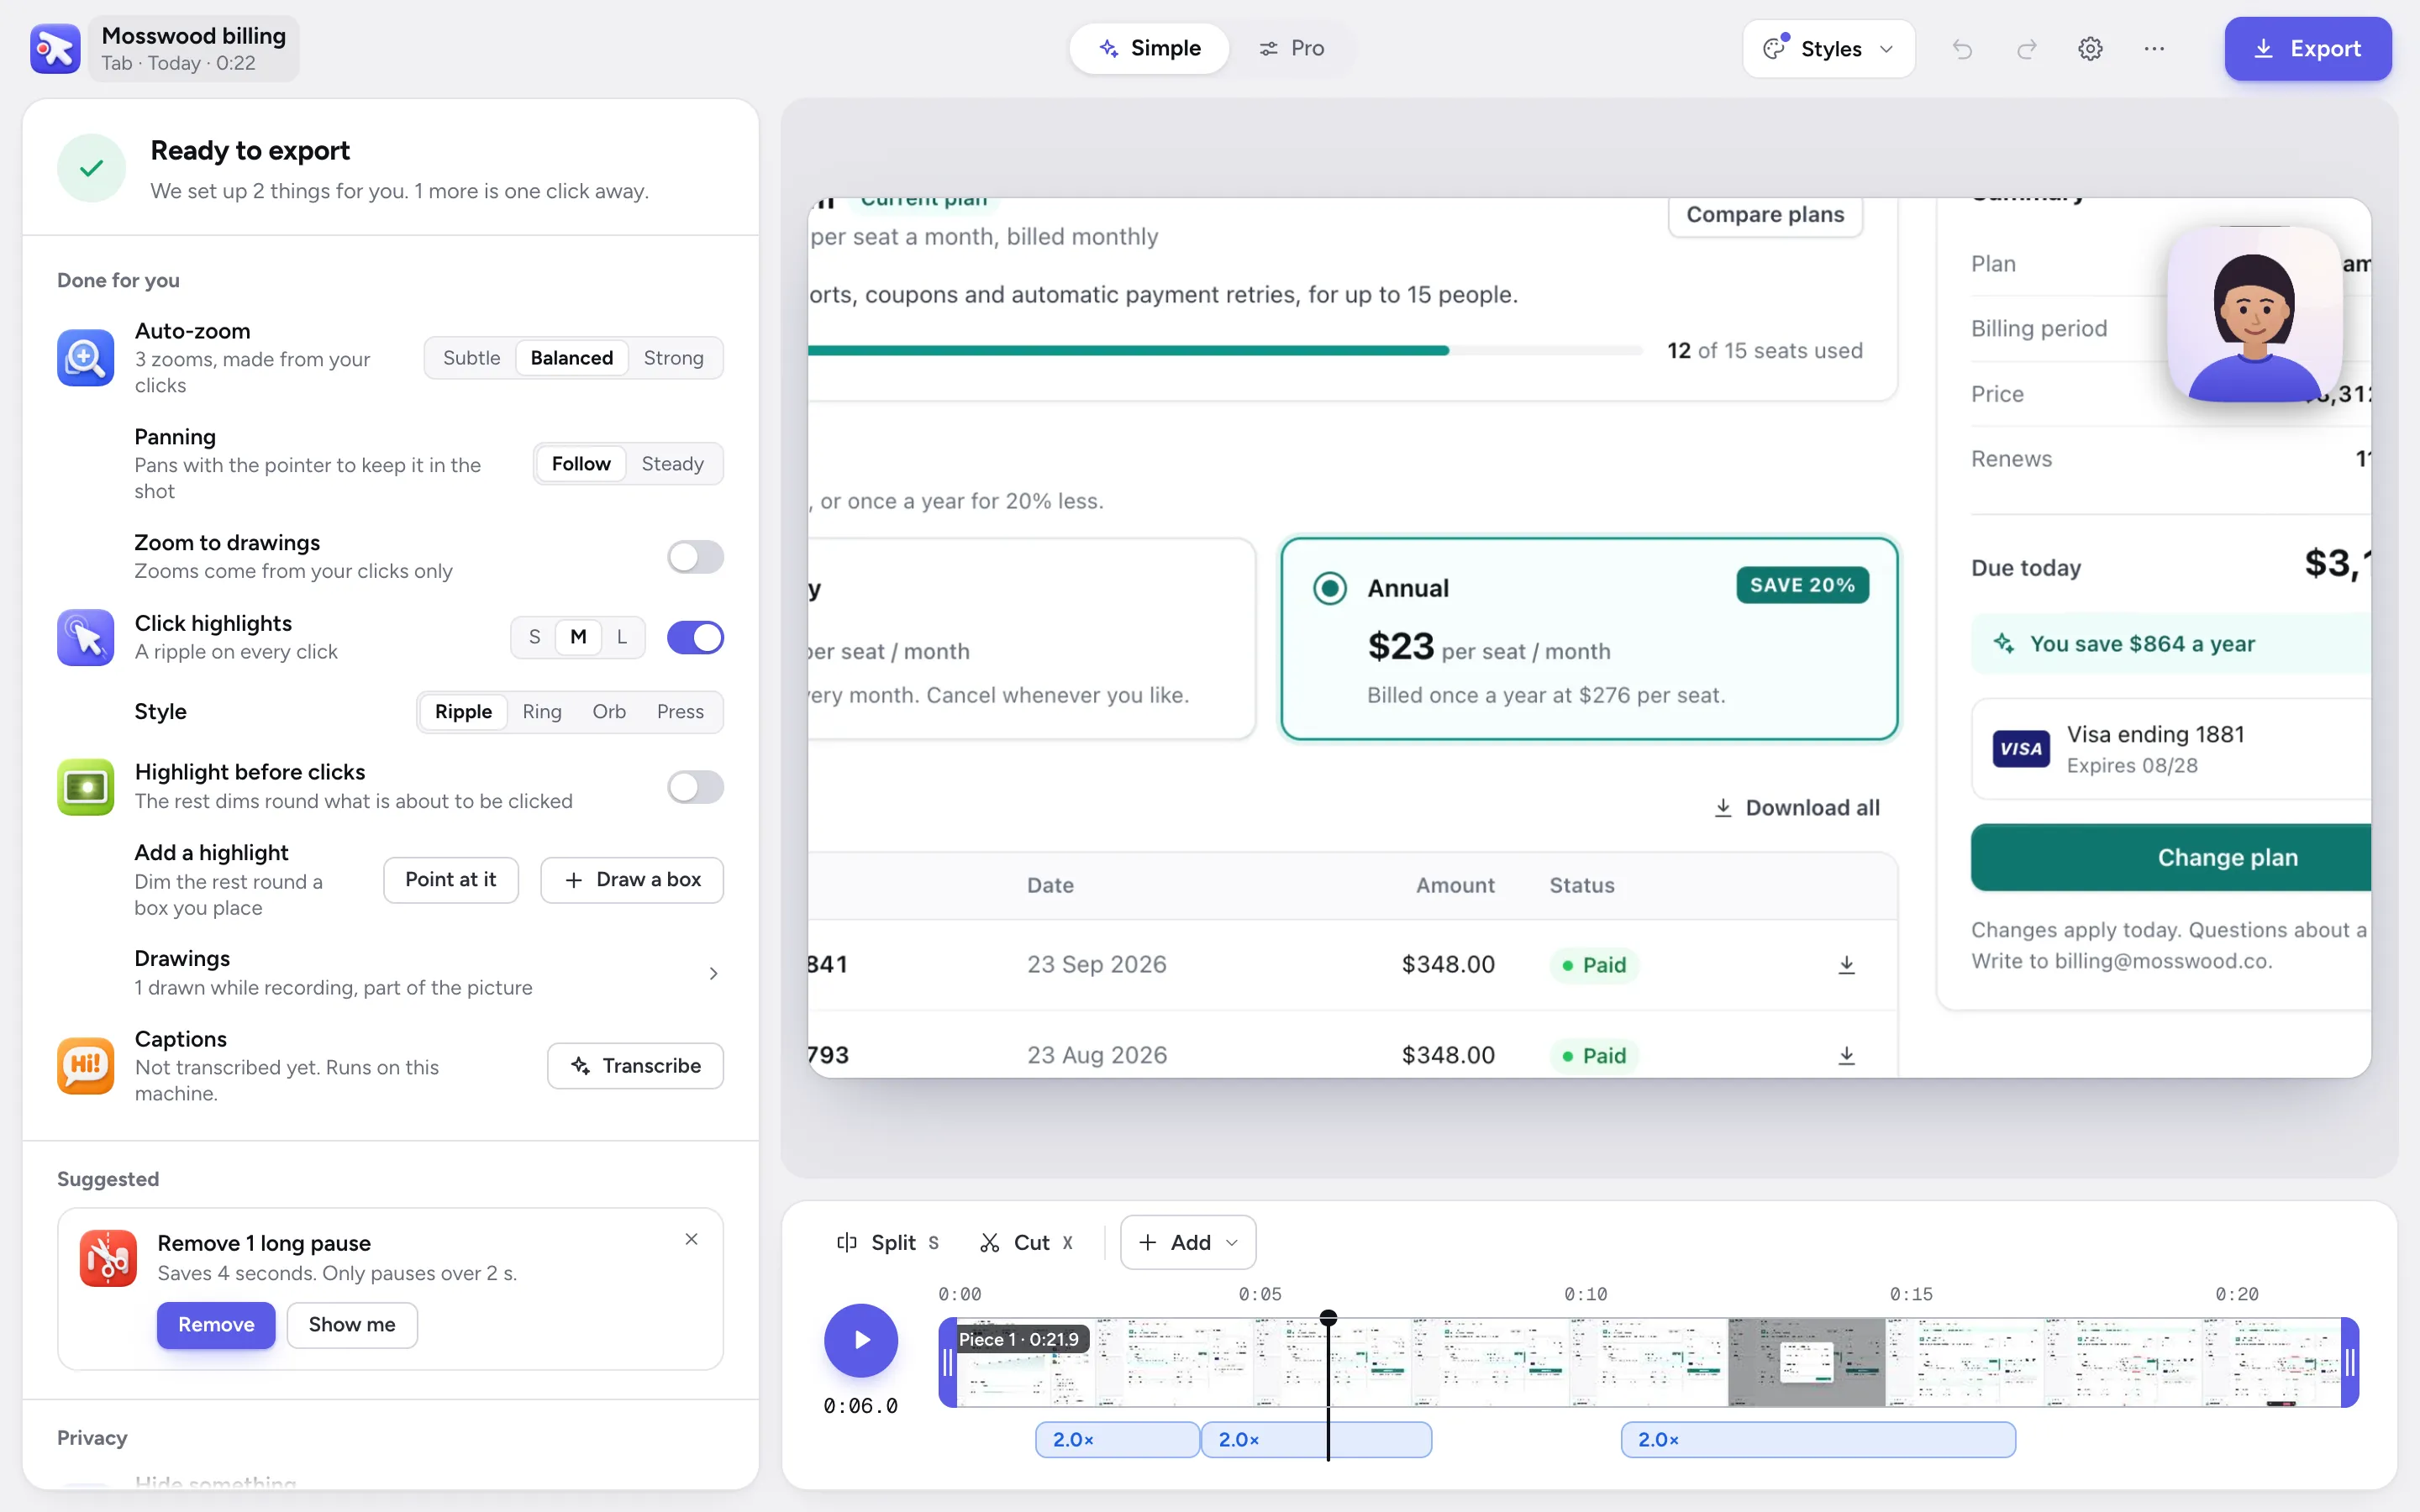
The editor has four parts: the header across the top, a column of settings on the left, the preview in the middle, and the timeline under it.
Mac appChrome
1
2
3
4
- 1The header: the video’s name, Simple and Pro, Styles, Export
- 2The column: Simple’s rows, or Pro’s areas
- 3The stage: the video as it will export
- 4The timeline: play, trim, and what happens when
- The header
- The way back to the library, the video’s name, the Simple and Pro switch, Styles, undo and redo, Settings, the ⋯ menu and Export.
- The column
- In Simple, what PointerCam already did and the choices most videos make. In Pro, every setting, in seven areas.
- The preview
- The finished video as it will export. Click anything on it to change it.
- The timeline
- In Simple, the footage and its zooms, with Split, Cut and Add over them, and a row for covers, speed changes or callouts once there are any. In Pro, every lane: the footage, zooms, camera layouts, covers, callouts, captions and sound.
The header#
- Click the video’s name to rename it and see its details. The line under it says where it came from and how long it is.
- Styles puts a saved look on the video in one click. See Styles.
- In Pro, the shape chip beside Styles sets the video’s shape, such as 16:9 or 9:16.
- The ⋯ menu saves the frame on screen as a picture, opens it in the screenshot editor, makes the step-by-step guide, goes full screen, and lists the keyboard shortcuts.
- Export makes the file. See Export a video.
Read next
Simple and ProSimple holds what the editor did and the choices most videos need, one click each. Pro has every setting, under the same names. Switch with the pill in the header.Search the settingsPress ⌘K in the editor and type what you see or what you want, like shadow or silence. Each result says where it lives, and Return opens it.Click anything on the preview to change itClick your camera, the recording, the captions, your logo or a callout on the preview. Its settings open in the column, and you can drag it into place.Use the timelineThe timeline lays the video out left to right, with a lane for each kind of change. Drag the playhead to scrub, and zoom the timeline with + and −.

Something not working the way this page says? See Troubleshooting, or start from Getting started.